Campaign Monitor supports the concept of “custom fields” so that you can store extra information about your mailing list subscribers.
You might use this to track who signed up via a particular widget, promotion, or page on your site. We’re going to run through a straightforward example of how you could set this up using our WordPress Ajax Campaign Monitor Widgets plugin to store a “Promotion” field against list subscribers.

Setting Up Your Custom Fields
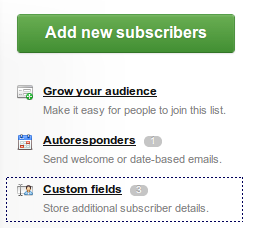
First – set up the custom field you want to store against your Campaign Monitor list. Log into your Campaign Monitor account, choose your list, and click on the “Custom Fields” link under “List Settings”.
This will allow you to set up the custom fields that you want to use for this list.
Note: All Custom Fields are optional so you won’t break any existing forms by doing this.
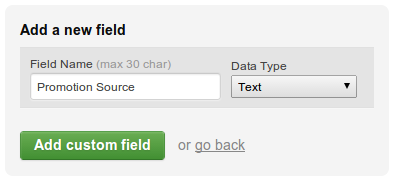
Once you’re on the Custom Fields page, the next step is to create your fields, in our example, we’re going to set up a single field called “Promotion Source”.

Hit “Add Custom Field”, and your field will be added to the list at the bottom of the page. Make a note of the Personalization Tag that’s been assigned to your field.

In this case our field has been given the key “PromotionSource” – you’ll need to use this in your setup shortly.
Making WordPress Set Your Custom Fields
Now that the Campaign Monitor knows about the custom fields you want to use, now’s the time to make sure that they get populated by our WordPress widgets.
At time of writing, there’s no way to extend the forms that users see when they’re signing up using our widgets (It’s on our To Do list!), but in our case that’s not necessary as we simply want the widgets / shortcodes to populate fixed information (ie – not provided by the user) into the fields.
So, our plugin provides two WordPress filters that we can use to add information to the custom fields:
cm_widget_custom_fields ($current_fields, $widget_id)
cm_shortcode_custom_fields ($current_fields, $shortcode_id)
As you can see, both filters get passed some information. For our first example, we’ll assume that we want any of our online signup forms to record a “Promotion Source” of “Website” – later on we’ll cover some more advanced examples.
To add the fields, and set them to website, we’ll add a small section of code to our WordPress theme’s functions.php:
function add_promotion_custom_field( $current_fields, $widget_id ) {
    $custom_fields[] = array( "Key" => 'PromotionSource', "Value" => 'Website' );
    return $custom_fields;
}
add_filter( 'cm_widget_custom_fields', 'add_promotion_custom_field' );
add_filter( 'cm_shortcode_custom_fields', 'add_promotion_custom_field' );
You’ll notice that we’ve set the “Key” to PromotionSource, which is the value we got from the Campaign Monitor personalization tag earlier. We’ve also attached our function to both filters so it will get run whether the signup form is a widget, or a shortcode.
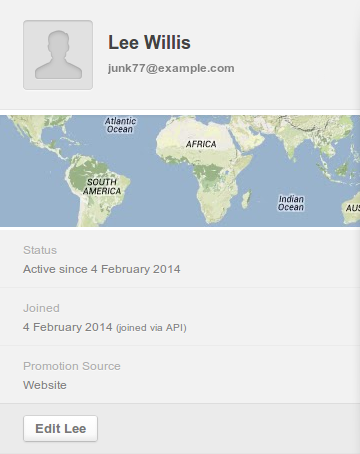
The result is that our subscriber gets created with the custom field value set to “Website” :

Advanced Examples
What if we want to differentiate between people who signed up from the sidebar widgets, or those who signed up from dedicated sign-up pages on our site? The following code attaches the filters to two different functions so that we can change the Promotion Source that gets set.
function add_widget_custom_field( $current_fields, $widget_id ) {
    $custom_fields[] = array( "Key" => 'PromotionSource', "Value" => 'Website-Sidebar' );
    return $custom_fields;
}
add_filter( 'cm_widget_custom_fields', 'add_widget_custom_field' );

function add_shortcode_custom_field($current_fields, $shortcode_id) {
    $custom_fields[] = array( "Key" => 'PromotionSource', "Value" => 'Website-Signup-Page' );
    return $custom_fields;
}
add_filter( 'cm_shortcode_custom_fields', 'add_shortcode_custom_field' );
If you get really advanced, then you can use the additional information passed into the functions to set different values based on the particular widget, or shortcode that the form belongs to. This can be useful, for example, if you want to identify people who sign up from a particular widget or shortcode.