Step 1 – Install & activate the plugin
Install & activate the plugin as you would any normal plugin. If in doubt – check out the the plugin installation article in the WordPress Codex.
Step 2 – Choose dashboard reports
Out of the box, the plugin will add the following widgets to your WordPress dashboard:
Store Revenue
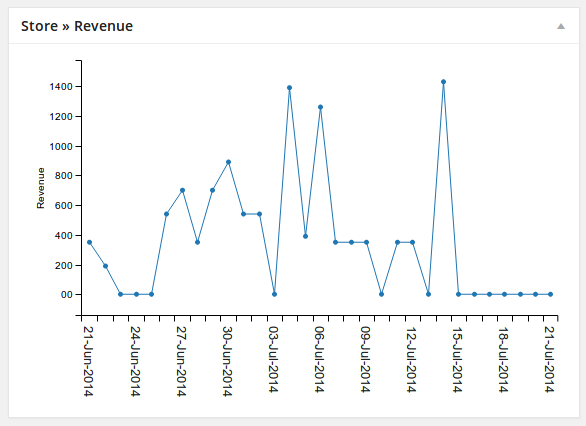
The store revenue report gives you an at-a-glance view of your store sales’ worth over the past four weeks. The graph will automatically scale with your sales, and allows you to see how your sales are performing against past weeks. Hover over individual points to see the exact figures.
Store Sales

The store sales report gives you a simple view of your sales volume over the past four weeks. The graph will automatically scale with the number of sales you make. The graph allows you to see how your sales are performing against past weeks. Hover over individual points to see the exact figures.
Top products
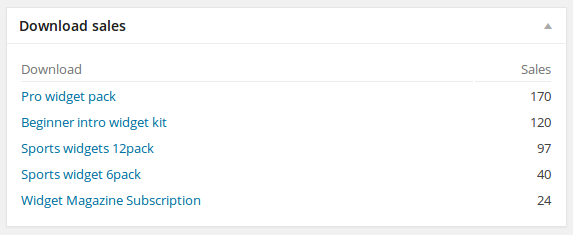 The download sales list shows you the top performing products in your store all-time. Easily see which of your products sell the most.
Step 3 – Choose dashboard widgets
You can choose which widgets you want displayed by using the Screen Options link in the top right of your WordPress dashboard. Simply enable or disable the widgets as you would any other dashboard widgets. You can also drag the widgets around to different positions on your dashboard as you would any normal WordPress dashboard widget.
Step 4 – Access exports
When you’re ready to export payments, visit Downloads » Export payments to get started. You can choose the date range, payment status, whether to export summary information, or detailed line-level information, and even choose specific fields to include/exclude. Check out our article on exporting payments for more information.